前言:
前面几篇讲了自定义控件绘制原理Android自定义控件之基本原理(一),自定义属性Android自定义控件之自定义属性(二),自定义组合控件Android自定义控件之自定义组合控件(三),常言道:“好记性不如烂笔头,光说不练假把式!!!”,作为一名学渣就是因为没有遵循这句名言才沦落于此,所以要谨遵教诲,注重理论与实践相结合,今天通过自定义ViewGroup来实现一下项目中用到的标签云。
需求背景:
公司需要实现一个知识点的标签显示,每个标签的长度未知,如下图所示

基本绘制流程:
绘制原理这里不再介绍大致介绍下绘制流程
- 构造函数获取自定义属性
- onMeasure()方法,测量子控件的大小
- onLayout()方法,对子控件进行布局
1.)自定义属性
<declare-styleable name="TagsLayout">
        <attr name="tagVerticalSpace" format="dimension" />
        <attr name="tagHorizontalSpace" format="dimension" />
</declare-styleable>
2.)构造函数中获取自定义属性值
    private int childHorizontalSpace;
    private int childVerticalSpace;

    public TagsLayout(Context context, AttributeSet attrs) {
        super(context, attrs);
        TypedArray attrArray = context.obtainStyledAttributes(attrs, R.styleable.TagsLayout);
        if (attrArray != null) {
            childHorizontalSpace = attrArray.getDimensionPixelSize(R.styleable.TagsLayout_tagHorizontalSpace, 0);
            childVerticalSpace = attrArray.getDimensionPixelSize(R.styleable.TagsLayout_tagVerticalSpace, 0);
            attrArray.recycle();
        }
    }
3.)onMeasure函数测量子控件大小,然后设置当前控件大小
    /**
     * 负责设置子控件的测量模式和大小 根据所有子控件设置自己的宽和高
     */
    @Override
    protected void onMeasure(int widthMeasureSpec, int heightMeasureSpec) {
        super.onMeasure(widthMeasureSpec, heightMeasureSpec);
        // 获得它的父容器为它设置的测量模式和大小
        int sizeWidth = MeasureSpec.getSize(widthMeasureSpec);
        int sizeHeight = MeasureSpec.getSize(heightMeasureSpec);
        int modeWidth = MeasureSpec.getMode(widthMeasureSpec);
        int modeHeight = MeasureSpec.getMode(heightMeasureSpec);
        // 如果是warp_content情况下,记录宽和高
        int width = 0;
        int height = 0;
        /**
         * 记录每一行的宽度,width不断取最大宽度
         */
        int lineWidth = 0;
        /**
         * 每一行的高度,累加至height
         */
        int lineHeight = 0;

        int count = getChildCount();
        int left = getPaddingLeft();
        int top = getPaddingTop();
        // 遍历每个子元素
        for (int i = 0; i < count; i++) {
            View child = getChildAt(i);
            if (child.getVisibility() == GONE)
                continue;
            // 测量每一个child的宽和高
            measureChild(child, widthMeasureSpec, heightMeasureSpec);
            // 得到child的lp
            MarginLayoutParams lp = (MarginLayoutParams) child.getLayoutParams();
            // 当前子空间实际占据的宽度
            int childWidth = child.getMeasuredWidth() + lp.leftMargin + lp.rightMargin + childHorizontalSpace;
            // 当前子空间实际占据的高度
            int childHeight = child.getMeasuredHeight() + lp.topMargin + lp.bottomMargin + childVerticalSpace;
            /**
             * 如果加入当前child,则超出最大宽度,则的到目前最大宽度给width,类加height 然后开启新行
             */
            if (lineWidth + childWidth > sizeWidth - getPaddingLeft() - getPaddingRight()) {
                width = Math.max(lineWidth, childWidth);// 取最大的
                lineWidth = childWidth; // 重新开启新行,开始记录
                // 叠加当前高度,
                height += lineHeight;
                // 开启记录下一行的高度
                lineHeight = childHeight;
                child.setTag(new Location(left, top + height, childWidth + left - childHorizontalSpace, height + child.getMeasuredHeight() + top));
            } else {// 否则累加值lineWidth,lineHeight取最大高度
                child.setTag(new Location(lineWidth + left, top + height, lineWidth + childWidth - childHorizontalSpace + left, height + child.getMeasuredHeight() + top));
                lineWidth += childWidth;
                lineHeight = Math.max(lineHeight, childHeight);
            }
        }
        width = Math.max(width, lineWidth) + getPaddingLeft() + getPaddingRight();
        height += lineHeight;
        sizeHeight += getPaddingTop() + getPaddingBottom();
        height += getPaddingTop() + getPaddingBottom();
        setMeasuredDimension((modeWidth == MeasureSpec.EXACTLY) ? sizeWidth : width, (modeHeight == MeasureSpec.EXACTLY) ? sizeHeight : height);
    }
通过遍历所有子控件调用measureChild函数获取每个子控件的大小,然后通过宽度叠加判断是否换行,叠加控件的高度,同时记录下当前子控件的坐标,这里记录坐标引用了自己写的一个内部类Location.java
    /**
     * 记录子控件的坐标
     */
    public class Location {
        public Location(int left, int top, int right, int bottom) {
            this.left = left;
            this.top = top;
            this.right = right;
            this.bottom = bottom;
        }

        public int left;
        public int top;
        public int right;
        public int bottom;

    }
4.)onLayout函数对所有子控件重新布局
    @Override
    protected void onLayout(boolean changed, int l, int t, int r, int b) {
        int count = getChildCount();
        for (int i = 0; i < count; i++) {
            View child = getChildAt(i);
            if (child.getVisibility() == GONE)
                continue;
            Location location = (Location) child.getTag();
            child.layout(location.left, location.top, location.right, location.bottom);
        }
    }
这里直接遍历所有子控件调用子控件的layout函数进行布局。
如何使用:
1.布局问自己中直接引用
<?xml version="1.0" encoding="utf-8"?>
<LinearLayout xmlns:android="http://schemas.android.com/apk/res/android"
    xmlns:lee="http://schemas.android.com/apk/res-auto"
    android:layout_width="match_parent"
    android:layout_height="match_parent"
    android:orientation="vertical">

    <com.whoislcj.views.TagsLayout
        android:id="@+id/image_layout"
        android:layout_width="match_parent"
        android:layout_height="wrap_content"
        android:layout_margin="10dp"
        lee:tagHorizontalSpace="10dp"
        lee:tagVerticalSpace="10dp" />

</LinearLayout>
2.)代码添加标签
TagsLayout imageViewGroup = (TagsLayout) findViewById(R.id.image_layout);
ViewGroup.MarginLayoutParams lp = new ViewGroup.MarginLayoutParams(ViewGroup.LayoutParams.WRAP_CONTENT, ViewGroup.LayoutParams.WRAP_CONTENT);
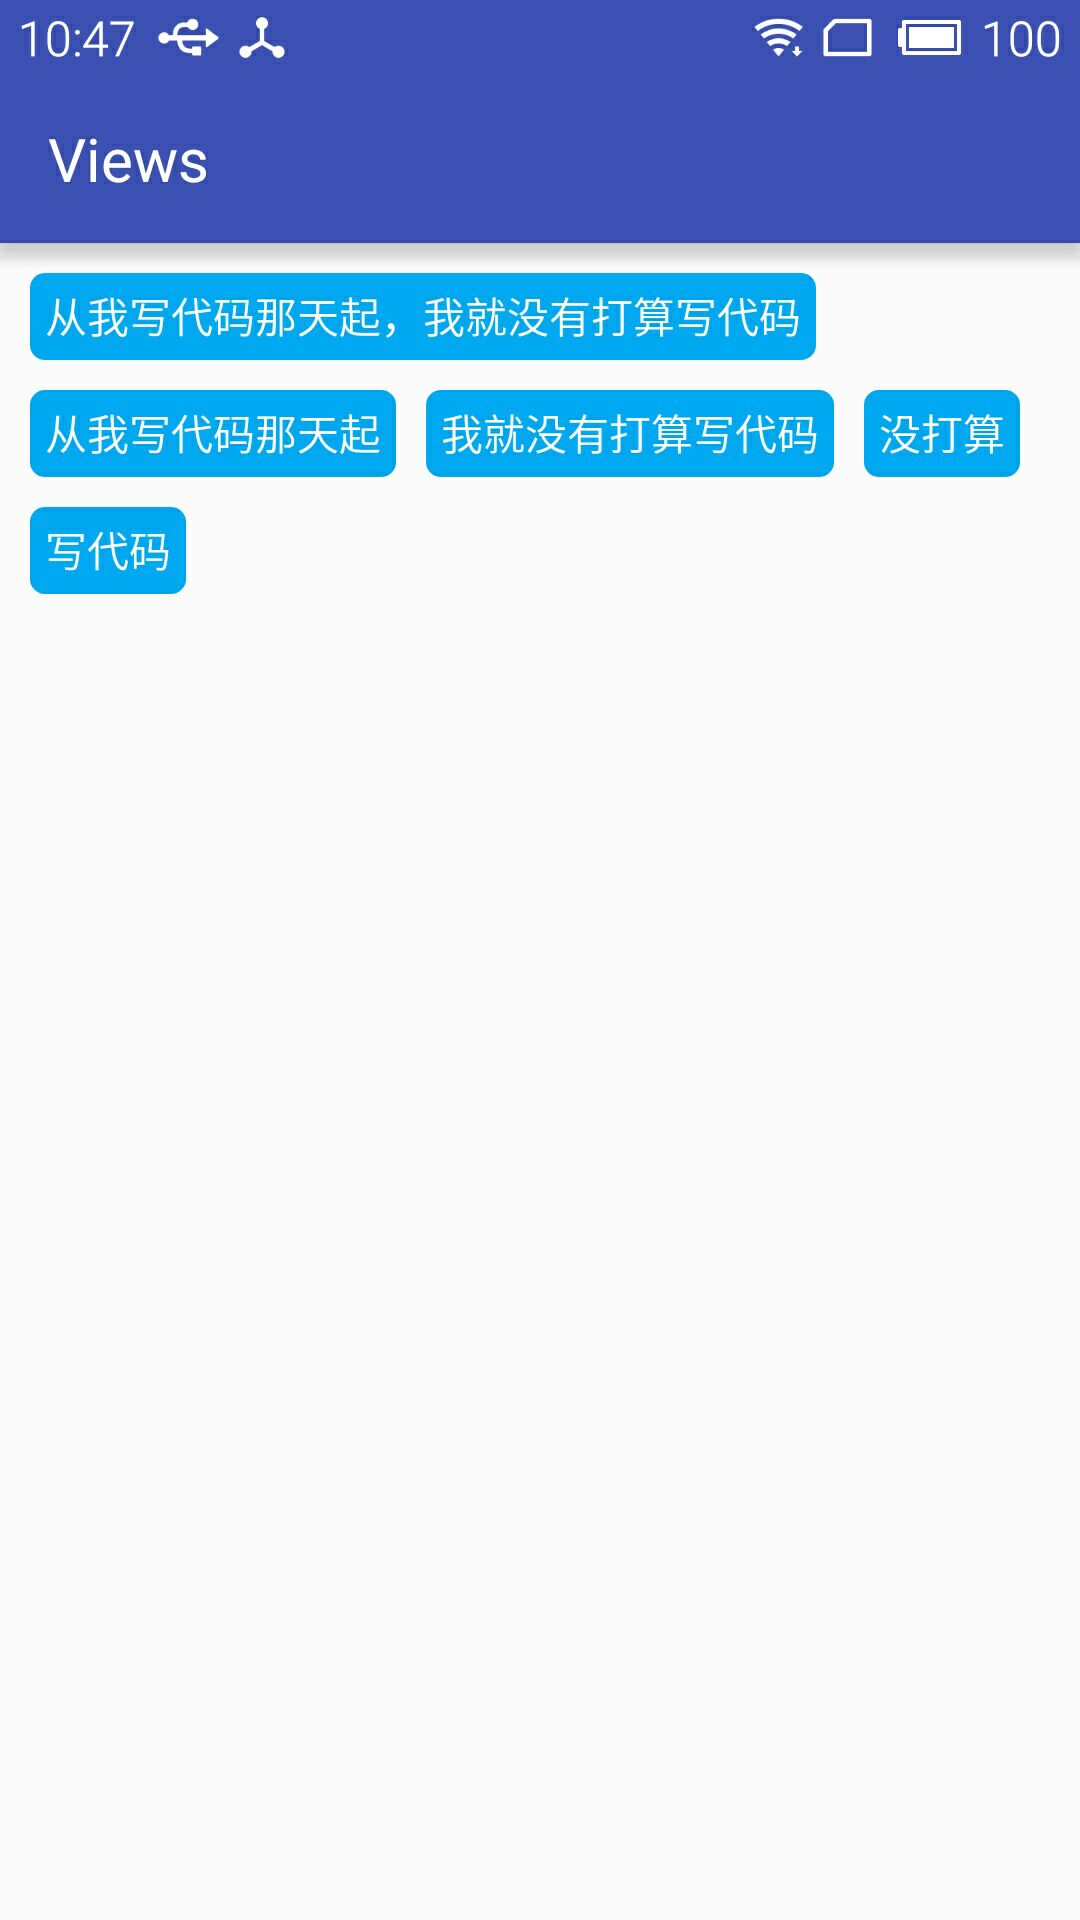
String[] string={"从我写代码那天起,我就没有打算写代码","从我写代码那天起","我就没有打算写代码","没打算","写代码"};
for (int i = 0; i < 5; i++) {
TextView textView = new TextView(this);
textView.setText(string[i]);
textView.setTextColor(Color.WHITE);
textView.setBackgroundResource(R.drawable.round_square_blue);
imageViewGroup.addView(textView, lp);
}
具体效果
3.)最后附上TagsLayout全部代码


public class TagsLayout extends ViewGroup {
    private int childHorizontalSpace;
    private int childVerticalSpace;

    public TagsLayout(Context context, AttributeSet attrs) {
        super(context, attrs);
        TypedArray attrArray = context.obtainStyledAttributes(attrs, R.styleable.TagsLayout);
        if (attrArray != null) {
            childHorizontalSpace = attrArray.getDimensionPixelSize(R.styleable.TagsLayout_tagHorizontalSpace, 0);
            childVerticalSpace = attrArray.getDimensionPixelSize(R.styleable.TagsLayout_tagVerticalSpace, 0);
            attrArray.recycle();
        }
    }

    /**
     * 负责设置子控件的测量模式和大小 根据所有子控件设置自己的宽和高
     */
    @Override
    protected void onMeasure(int widthMeasureSpec, int heightMeasureSpec) {
        super.onMeasure(widthMeasureSpec, heightMeasureSpec);
        // 获得它的父容器为它设置的测量模式和大小
        int sizeWidth = MeasureSpec.getSize(widthMeasureSpec);
        int sizeHeight = MeasureSpec.getSize(heightMeasureSpec);
        int modeWidth = MeasureSpec.getMode(widthMeasureSpec);
        int modeHeight = MeasureSpec.getMode(heightMeasureSpec);
        // 如果是warp_content情况下,记录宽和高
        int width = 0;
        int height = 0;
        /**
         * 记录每一行的宽度,width不断取最大宽度
         */
        int lineWidth = 0;
        /**
         * 每一行的高度,累加至height
         */
        int lineHeight = 0;

        int count = getChildCount();
        int left = getPaddingLeft();
        int top = getPaddingTop();
        // 遍历每个子元素
        for (int i = 0; i < count; i++) {
            View child = getChildAt(i);
            if (child.getVisibility() == GONE)
                continue;
            // 测量每一个child的宽和高
            measureChild(child, widthMeasureSpec, heightMeasureSpec);
            // 得到child的lp
            MarginLayoutParams lp = (MarginLayoutParams) child.getLayoutParams();
            // 当前子空间实际占据的宽度
            int childWidth = child.getMeasuredWidth() + lp.leftMargin + lp.rightMargin + childHorizontalSpace;
            // 当前子空间实际占据的高度
            int childHeight = child.getMeasuredHeight() + lp.topMargin + lp.bottomMargin + childVerticalSpace;
            /**
             * 如果加入当前child,则超出最大宽度,则的到目前最大宽度给width,类加height 然后开启新行
             */
            if (lineWidth + childWidth > sizeWidth - getPaddingLeft() - getPaddingRight()) {
                width = Math.max(lineWidth, childWidth);// 取最大的
                lineWidth = childWidth; // 重新开启新行,开始记录
                // 叠加当前高度,
                height += lineHeight;
                // 开启记录下一行的高度
                lineHeight = childHeight;
                child.setTag(new Location(left, top + height, childWidth + left - childHorizontalSpace, height + child.getMeasuredHeight() + top));
            } else {// 否则累加值lineWidth,lineHeight取最大高度
                child.setTag(new Location(lineWidth + left, top + height, lineWidth + childWidth - childHorizontalSpace + left, height + child.getMeasuredHeight() + top));
                lineWidth += childWidth;
                lineHeight = Math.max(lineHeight, childHeight);
            }
        }
        width = Math.max(width, lineWidth) + getPaddingLeft() + getPaddingRight();
        height += lineHeight;
        sizeHeight += getPaddingTop() + getPaddingBottom();
        height += getPaddingTop() + getPaddingBottom();
        setMeasuredDimension((modeWidth == MeasureSpec.EXACTLY) ? sizeWidth : width, (modeHeight == MeasureSpec.EXACTLY) ? sizeHeight : height);
    }

    @Override
    protected void onLayout(boolean changed, int l, int t, int r, int b) {
        int count = getChildCount();
        for (int i = 0; i < count; i++) {
            View child = getChildAt(i);
            if (child.getVisibility() == GONE)
                continue;
            Location location = (Location) child.getTag();
            child.layout(location.left, location.top, location.right, location.bottom);
        }
    }

    /**
     * 记录子控件的坐标
     */
    public class Location {
        public Location(int left, int top, int right, int bottom) {
            this.left = left;
            this.top = top;
            this.right = right;
            this.bottom = bottom;
        }

        public int left;
        public int top;
        public int right;
        public int bottom;

    }
}
TagsLayout.java
总结:
至此有关简单的自定义控件已经介绍的差不多了,项目中很复杂的控件现在涉及的比较少,以后用到之后再做记录。
时间: 2024-08-12 01:16:12